In our previous write-up, you learned about building apps with Vision Pro.
Today, we’re offering a step-by-step guide to migrating your apps to Vision Pro.
We’ll scrutinize different factors to gauge your app’s success on Vision Pro.
We’ll highlight other key points to ponder during this shift.
Our journey starts with a simple check – ensuring your app and Vision Pro are compatible. Let’s get started!
Table of Contents
Evaluating App Compatibility
Apple has a range of programs to aid apps transitioning to the Vision Pro’s app store.
One includes compatibility assessments for those with an existing iPad or iPhone app, providing you with a report on your app or game’s performance in visionOS.
There are also globally available developer labs where you can watch your visionOS, iPadOS, and iOS apps in action on Vision Pro. The Developer Kit helps developers swiftly build, test, and tweak apps on Apple Vision Pro.
But what should we be mindful of when verifying an app’s compatibility with Vision Pro?
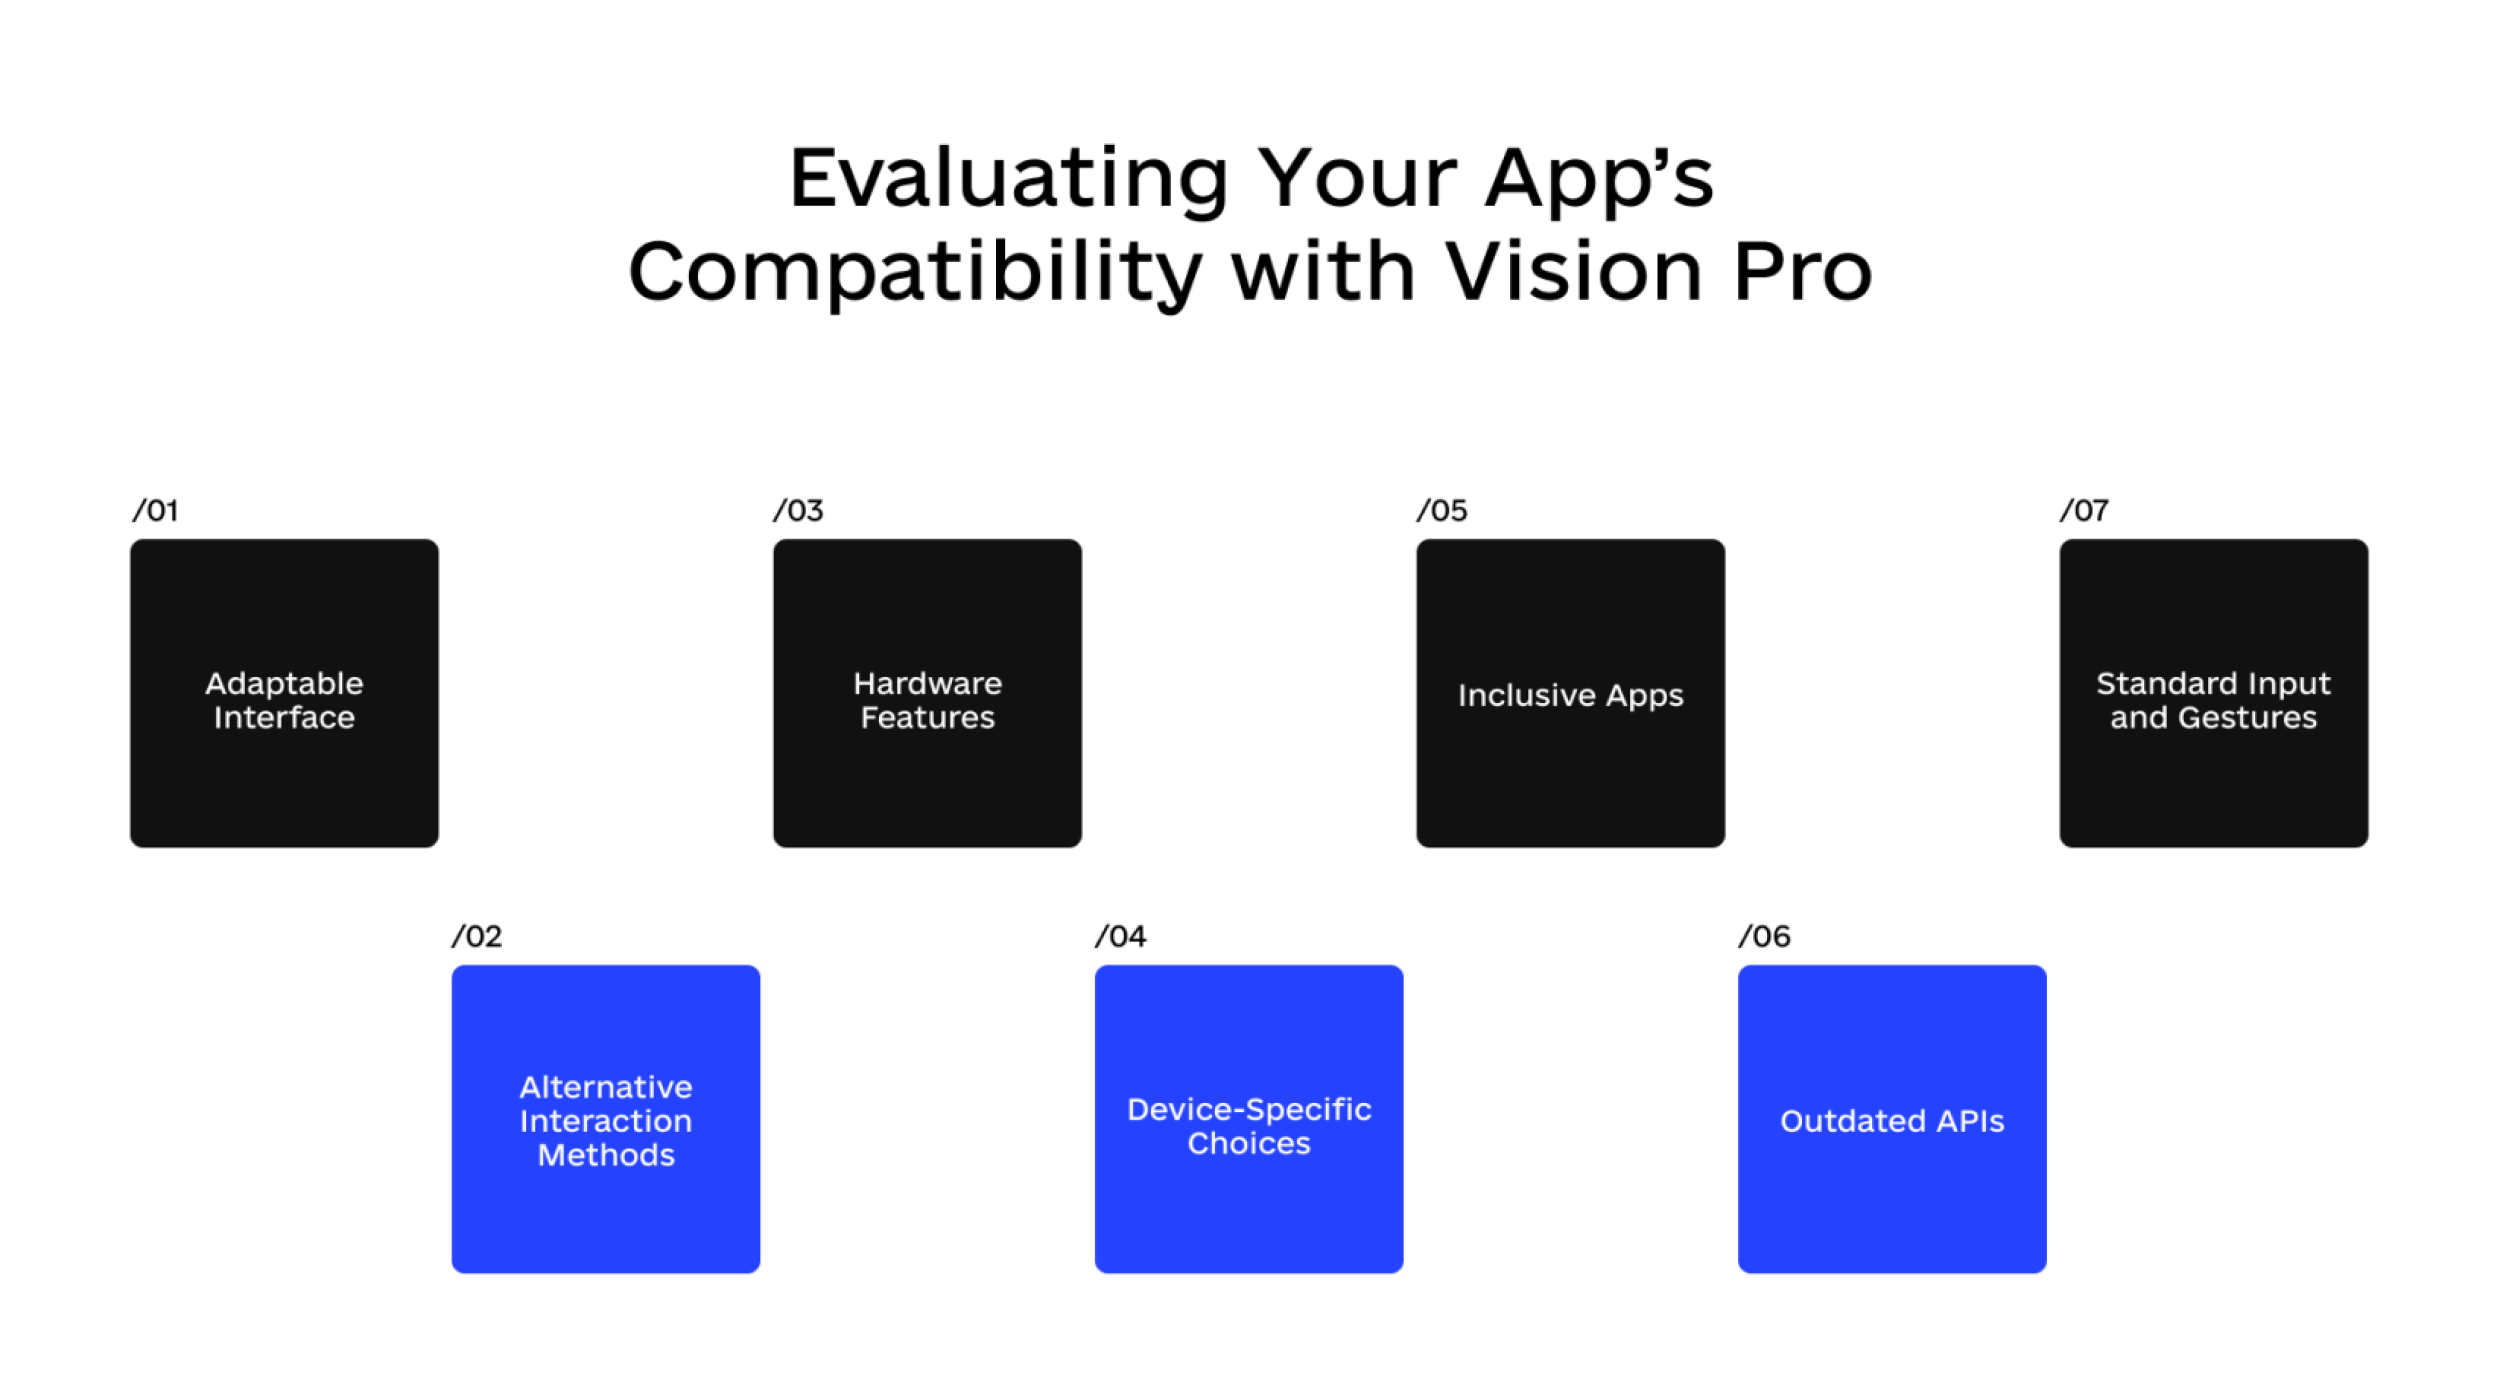
Adaptable Interface
Apps with flexible layouts can easily transition their code to platforms like visionOS. SwiftUI and Xcode are particularly user-friendly interfaces for this. Unity can also be a good fit for creating an immersive VR experience. Remember, using scenes in visionOS for your interface presentation is key.
Checking Hardware and Features
You can use various frameworks to test if the current device supports specific features. Always test your app’s layout on different devices and orientations. Make sure any layout changes animate smoothly and are fitting. Also, ensure that the current device supports the features you want to use to avoid issues when switching to visionOS.
Inclusive Apps
VisionOS can help you build apps that are accessible and have a positive impact on people’s lives. Consider tailoring your app for different nations, regions, and languages. It’s also essential to assess your app’s accessibility support and make navigation and information easier to access for all users. Aim to choose words and terms that are inclusive.
Standard Input and Gestures
With built-in gesture recognizers, supporting any platform is simpler, and visionOS automatically maps input to these recognizers. It’s beneficial to minimize the need for custom input and gesture recognizers, which may require adjustments in visionOS.
Alternative Interaction Methods
Adding command menu support can enable users to accomplish tasks using a keyboard. Such features, along with your app’s accessibility features, mean that individuals using specialized devices can interact with it more readily. This broadens the user’s ability to engage with your app even when touch or mouse events are unavailable.
Avoid Device-Specific Choices
If your app development decisions are too specific to a particular device, they might need to be fixed with visionOS. Making decisions based on situational requirements rather than device specificity is more advisable.
Update Outdated APIs
Apple often phases out older frameworks and APIs to accommodate newer ones. As a best practice, transition to these updated alternatives as soon as possible to ensure your code runs smoothly in visionOS.
Potential Challenges and Limitations in Integrating Apple Vision Pro into Your App
Awareness of the likely challenges of migrating existing software to Vision Pro helps prepare, minimize risks, and increase the chances of a successful transition.
Here are some obstacles you may face:
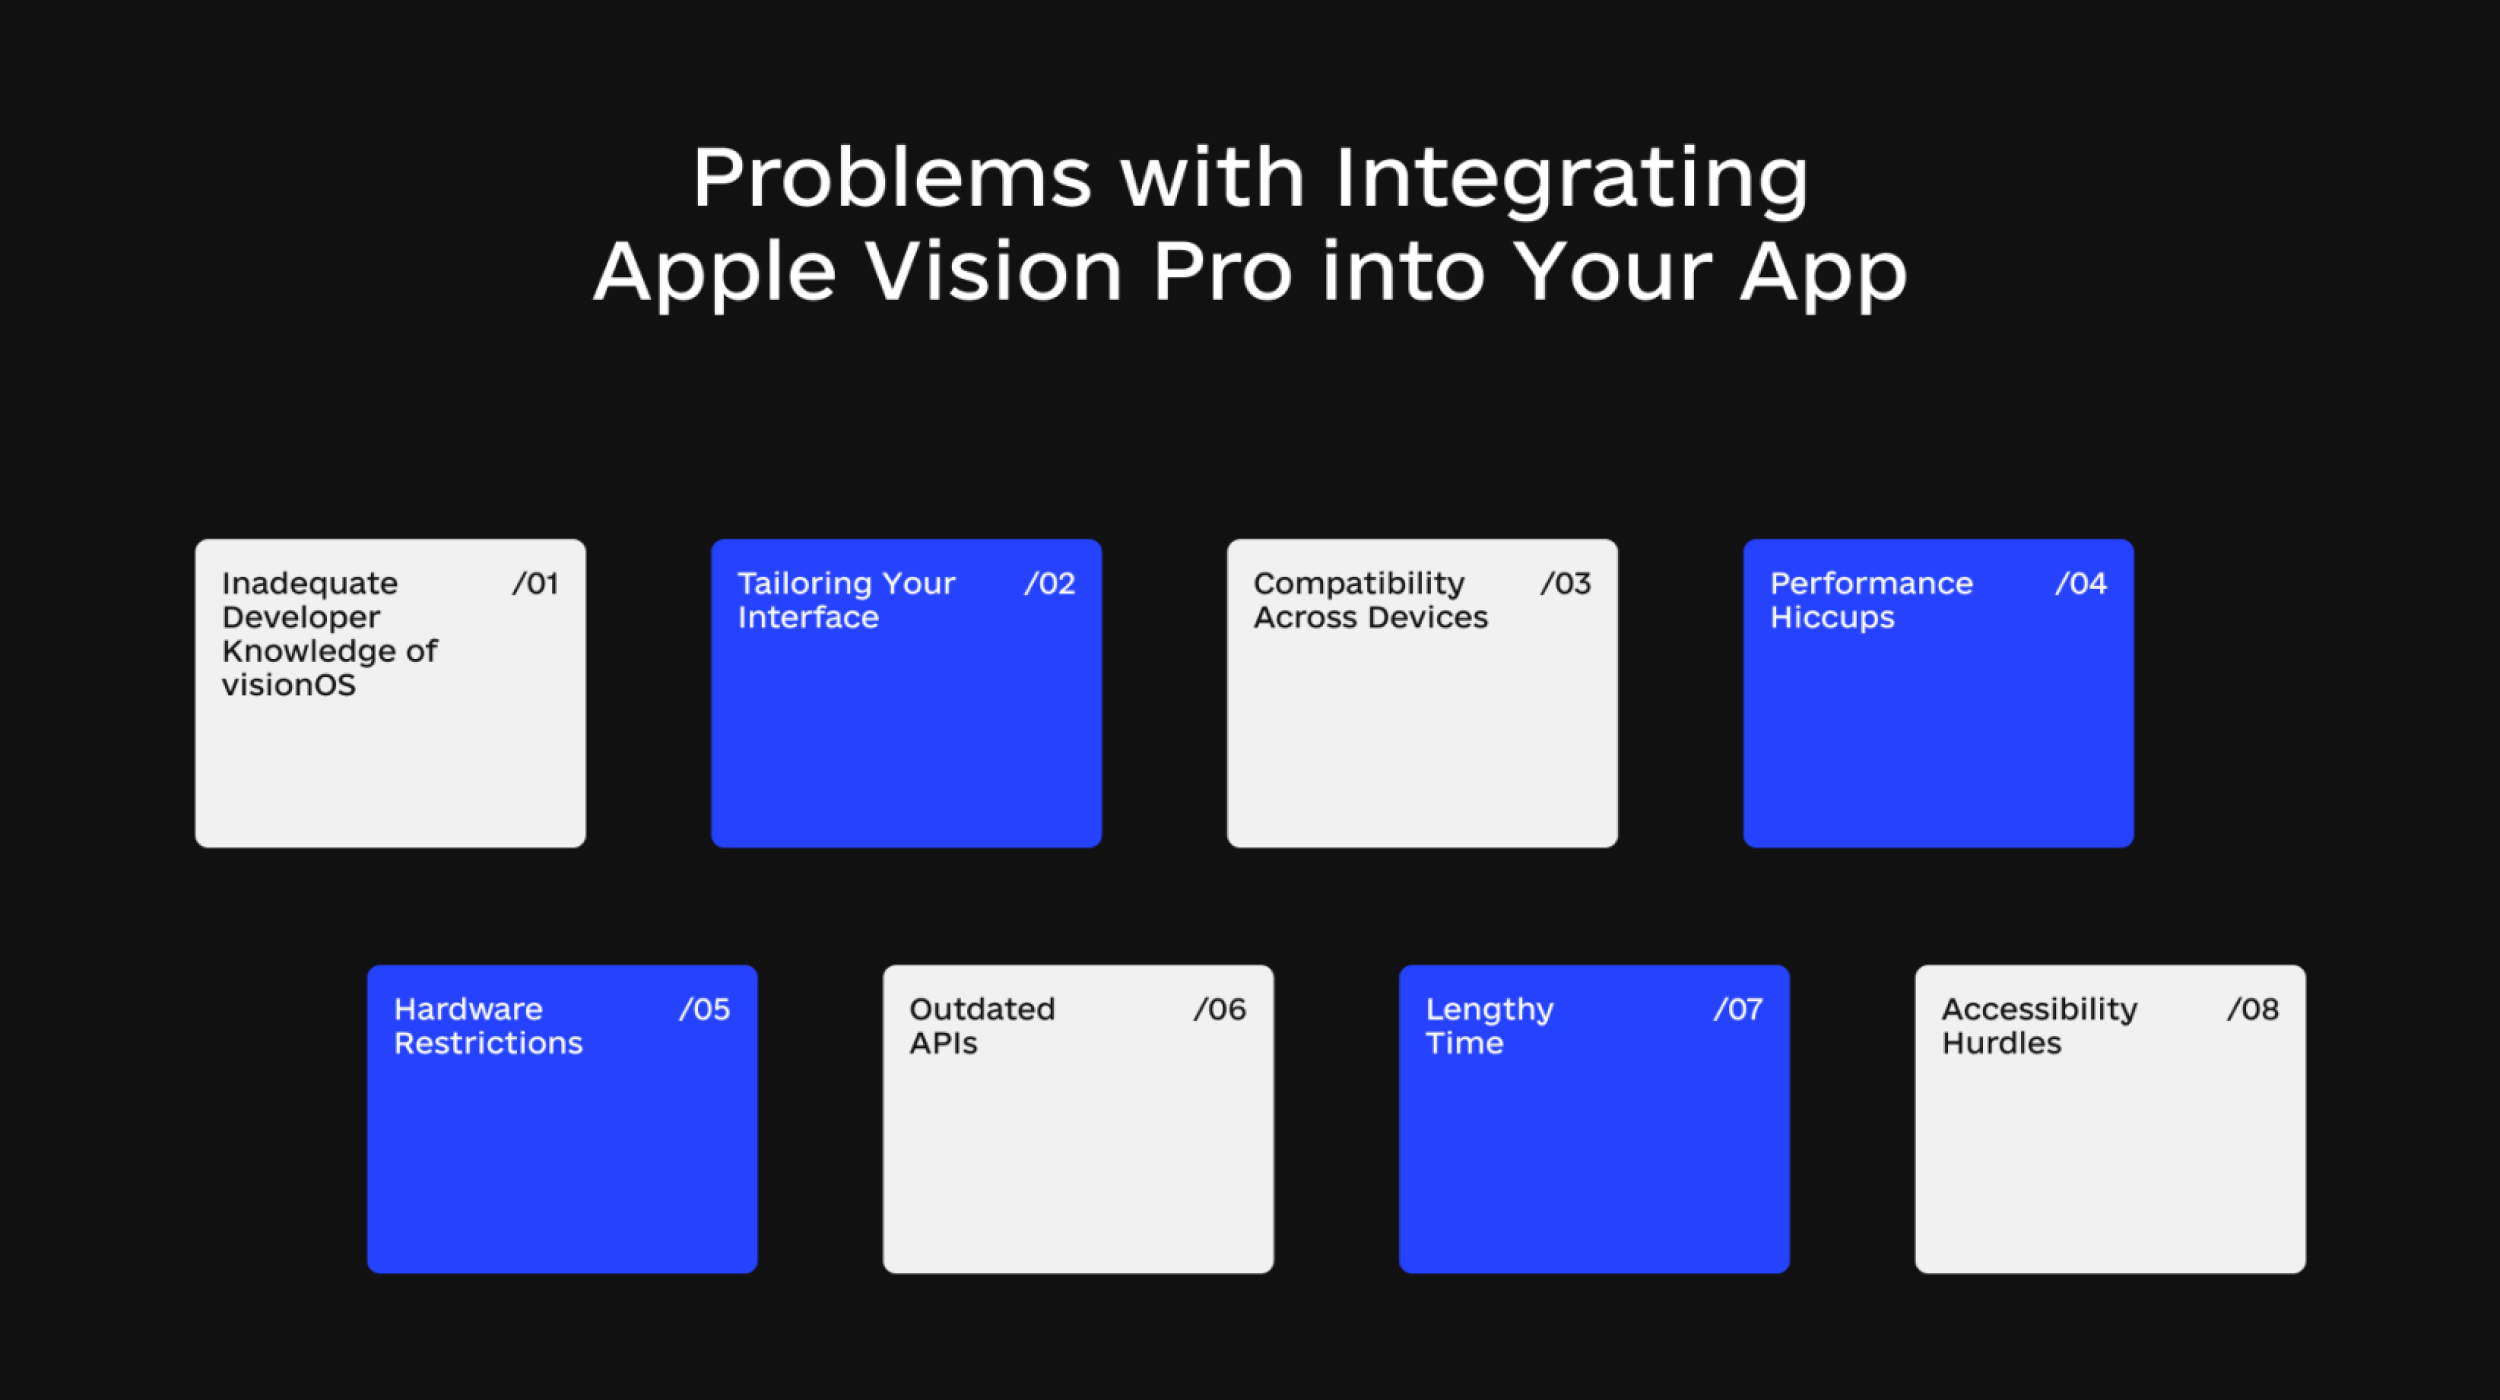
Inadequate Developer Knowledge of visionOS
A significant challenge in migrating to visionOS is the need for more familiarity among developers. Since the system offers unique features, developers need time to understand its workings. While developer kits will be available as a training tool before the device’s release next year, it’s important to note that these kits may only provide access to some of the features of visionOS.
Tailoring Your Interface
It may be tricky to tweak your app’s look (UI) for Apple Vision Pro. Depending on how intricate your UI is, the switch could take quite a bit of time and energy.
Compatibility Across Devices
As mentioned, ensuring your app works on all Apple devices – like iPhones, iPads, and devices using visionOS – could be a challenge. Different screens and device types mean you must test and plan carefully to give your users a consistent experience.
Performance Hiccups
The high-powered Vision Pro might cause some glitches if your app is still being prepared for it. Adjust parts of your code to ensure your app runs without a hitch.
Hardware Restrictions
Due to hardware limitations, some devices might only be able to use some Vision Pro features. This means you’ll have to juggle different app versions for different devices.
Outdated APIs
You might hit a snag if your app uses old or retired APIs from Apple. You’ll need to swap these with newer, Vision Pro-friendly APIs.
Lengthy Time
Migrating to Vision Pro might mean more time spent updating your app because of the learning curve with this new tech, necessary changes to your code, and extra testing to ensure everything works as it should.
Accessibility Hurdles
While Vision Pro has plenty of features to help users with disabilities, including these in your app and ensuring they function correctly can be a complex task that needs thoughtful design.
Planning the Migration Process
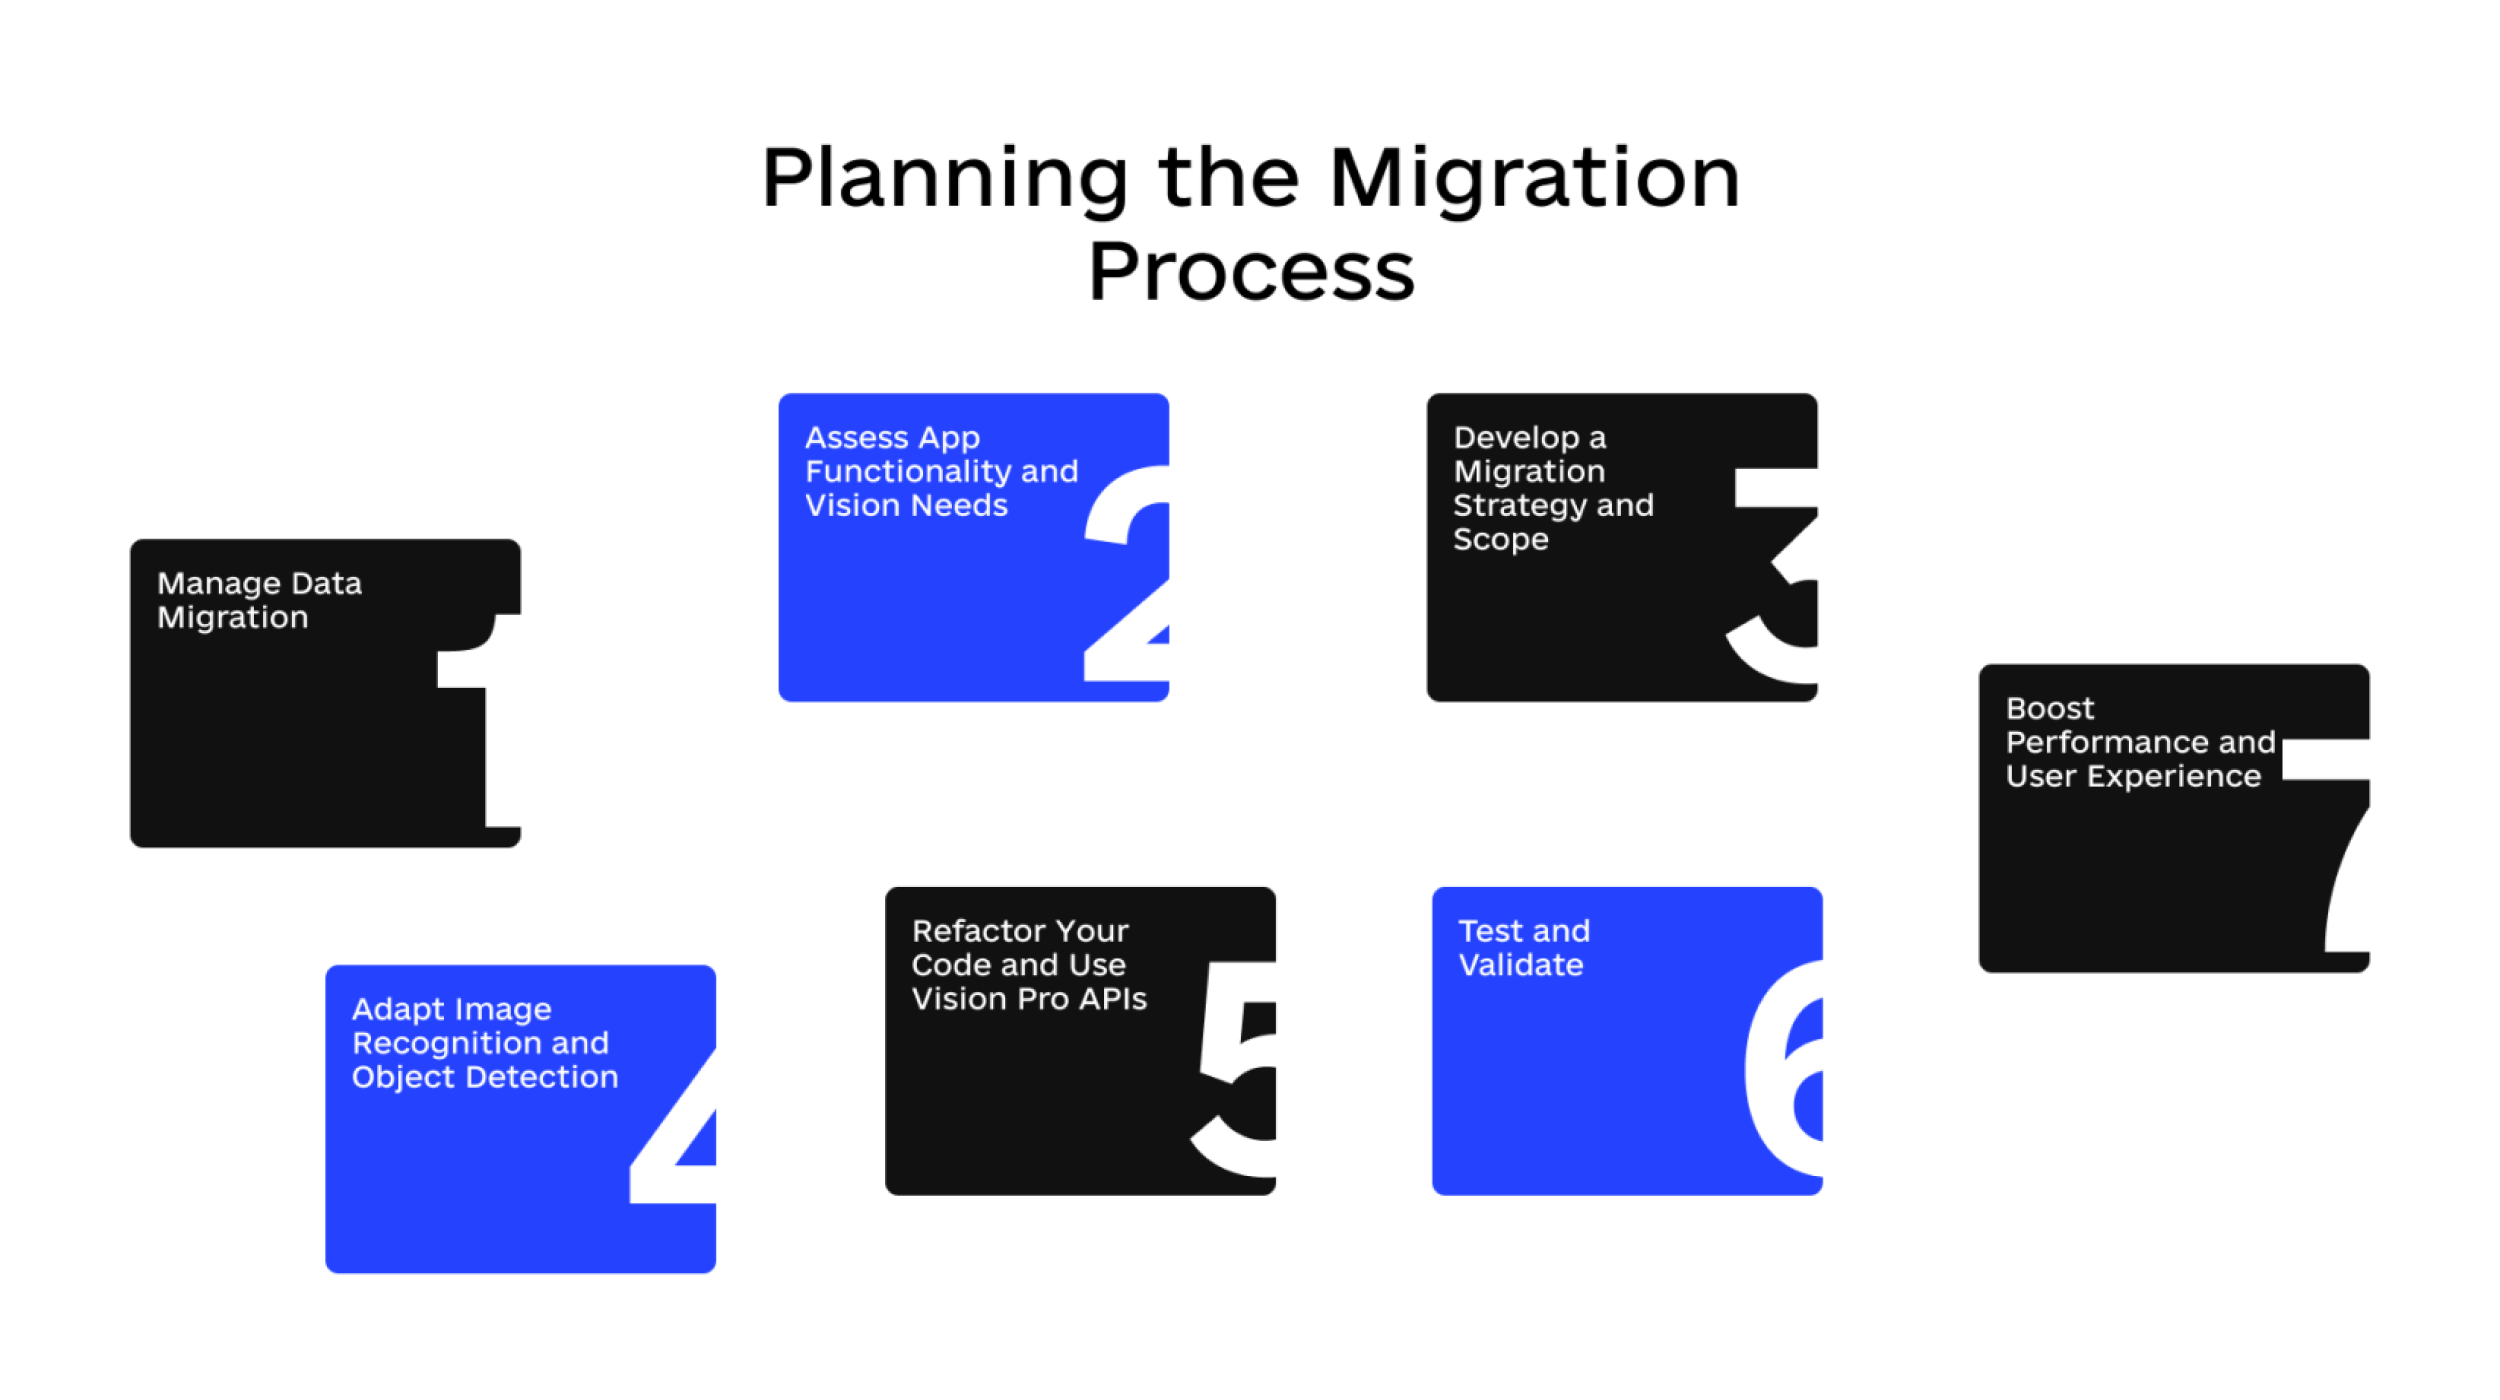
Planning to move your app to visionOS? Follow these steps to ensure a smooth transition.
Step1: Manage Data Migration
Clarify your Goals
Ask yourself why you’re moving your app and what you hope to achieve.
Decide on Compatibility
Figure out what devices your app should work with. Will it be widely or narrowly compatible?
Organize your Data
Like when you’re moving house, you’ll need to decide which data to bring and which to leave behind.
Backup Everything
Protect yourself against data loss, a common problem during migration, by backing up all your data.
Keep Data Safe
Migration can leave your data vulnerable to cyber-attacks. If possible, encrypt sensitive information.
Pick a Migration Strategy
Decide how quickly you want to move.
Train your Team
Make the migration process more efficient by ensuring everyone knows their roles.
Plan for Problems
Think of potential issues and come up with solutions ahead of time.
Set a Budget
Work out how much you’re willing to spend on the move.
Test at Every Stage
Check that everything works as it should before, during, and after migration.
Step 2: Assess App Functionality and Vision Needs
Vision Pro offers a fresh way for users to interact with apps. It’s all about immersive experiences. It could impact areas like:
Learning Boost
Apps like Duolingo and Udemy can provide engaging experiences. Learning with Vision Pro is like having a personal tutor. It makes studying more appealing and less distracting.
Productivity Lift
Vision Pro is like a computer you can wear. You can carry your work anywhere, not needing your personal computer.
Easy Object Identification
Imagine knowing everything about objects just by looking. Vision Pro’s advanced vision features can help create security, biology, or forensic psychology apps.
Depending on your app, different vision-related features can enhance it.
Object recognition helps read barcodes, track products, and assist the visually impaired. Image Recognition can monitor machinery for maintenance needs or track pests in agriculture. Computer vision systems can quickly perform full inventory scans.
Step 3: Develop a Migration Strategy and Scope
Planning a migration strategy ensures the efficiency of your product. Here are two strategies:
- Fast Track: A quick strategy for the entire migration. It’s speedy but can put pressure on the team. Good preparation can mitigate risks.
- Slow Track: This strategy breaks the migration into phases to avoid disruptions. It’s slower but reduces risks if done correctly.
Consider the changes your app would need. What features to drop, what to add? Some need to be enhanced due to Vision Pro’s capabilities. Also, be cautious about making too many changes to features that your users are already accustomed to, as it could potentially lead to a negative user experience.
Step 4: Adapt Image Recognition and Object Detection
When you’re tuning your app’s image recognition and object detection for Apple Vision Pro, these steps can help.
Data Preparation
Start by using data from your existing database or download a free one. Enter the data in the required format, keeping picture quality and size consistent to ensure the system processes it easily.
Identify and Classify
Decide which objects you want to recognize and classify. Use bounding boxes to outline these objects in images and assign them their classes.
Train Your Model
Review and train your image recognition model multiple times to enhance accuracy. The more you train, the better your app’s performance.
Final Evaluation
Once your app is well-trained, test its image detection using a new image. If it struggles, retrain with adjusted parameters, or change how you label and classify data.
Use the Data
Decide how your app will use or store the data collected. You can write custom code to extract the specific details your app needs from each observation.
Step 5: Refactor Your Code and Use Vision Pro APIs
Vision Pro’s computer vision powers image and object detection. Core ML, which allows machine learning models in apps, is a great tool if you add these capabilities. You’ll need a model in the Core ML Model format. Apple provides pre-trained models, or you can create your own.
If you’re refactoring a large amount of code, consider the structure of your app. Splitting it into modules by feature allows teams to work independently and test pieces separately.
Step 6: Test and Validate
Testing is crucial when moving your app to visionOS. The aim is to ensure a smooth transition while maintaining data, functionality, and compatibility with existing hardware and software.
Here are some testing tips:
- Pre-Migration Testing: This determines the project’s scope. Extensively test the old and new systems, and plan your testing approach and scenarios.
- On Migration Testing: While the migration is in progress, ensure all data is complete and not lost and the app functions correctly.
- Post-Migration Testing: After migration, conduct follow-up tests to verify the migration was successful. Check app performance, potential disruptions, and database security.
Also, conduct stress tests, exposing the app to heavy usage to identify technical issues, evaluate system speeds, and tackle potential security risks.
Step 7: Boost Performance and User Experience
When users open an app, they expect it to work well. They might delete it if it’s slow to launch or uses too much data. Apple Vision Pro can help improve user experience through the following:
Real-time Processing
Gather data from various sources to clearly understand your app’s performance.
Use Xcode Organizer
This tool can help you understand how well your app is performing regarding responsiveness, memory usage, and energy use. It can also help you identify issues your app might have with disk writes, crashes, or energy.
Model Optimization
Use the data from the previous step to identify any issues and make improvements. For example, if your app performs poorly on certain devices, you can use this information to fix the problem.
Incorporate Feedback
Use MetricKit to collect and analyze data. It can provide insights into things like network conditions, which can help you improve your app’s performance.
Migrating Existing Applications to Apple Vision Pro Costs & Timeline
Here’s the estimated timeline for migrating your existing applications to Vision Pro
Basic layout (1 day)
This step involves designing a simple yet efficient layout, serving as the blueprint for the application.
File Model Window (2 days)
The next two days are dedicated to creating a window for file selection and streamlining user interaction with files.
3D Object Support (30 days)
In this phase, functionality is developed to handle various 3D objects, enhancing the application’s versatility.
Volume Layout (8 days)
This stage introduces a sense of depth to the layout, enriching the perception of 3D objects within the application.
Reality Composer Pro Integration (15 days)
The power of the Reality Composer Pro kit gets harnessed during these days to help with 3D object visualization.
Rotation and Zoom (8 days)
Here, spatial input adds capabilities to rotate and zoom into 3D objects, making the application more interactive.
Object Movement (20 days)
This phase involves programming the application to move 3D objects in space, creating an even more dynamic user experience.
App Store and TestFlight Deployment (1 day)
The final day is reserved for deploying the application to the App Store and TestFlight, ready for user testing and feedback.
In total, this process will take approximately 4.5 months.
To determine the cost, we can estimate it based on the hourly rate.
On average, 30.44 days a month (considered a non-leap year). And in a day, there are 24 hours.
So, to calculate the conversion:
4.5 months * 30.44 days/month * 24 hours/day = 3,286.56 hours
Therefore, 4.5 months is approximately equal to 3,286.56 hours.
Considering an hourly rate between $30 and $35, we can calculate the cost as follows:
Minimum cost: 3,286.56 hours * $30/hour = $98,596.80
Maximum cost: 3,286.56 hours * $35/hour = $115,122.60
Therefore, the cost of migrating the app based on a 4.5-month timeframe would range between $98,596.80 and $115,122.60, depending on the hourly rate within the given range.
Conclusion
Vision Pro, along with its spatial computing systems and visionOS, presents powerful tools that redefine the boundaries of computing by merging the worlds of AR/VR and personal computers.
Though migrating your app to Vision Pro is no simple task, it entails various challenges. But going through the planning, testing, and optimization stages makes what initially seems difficult more manageable.
At Code&Care, we specialize in providing a seamless and optimized app migration experience.













Popular
Latest